Machiniste
Drum sampler
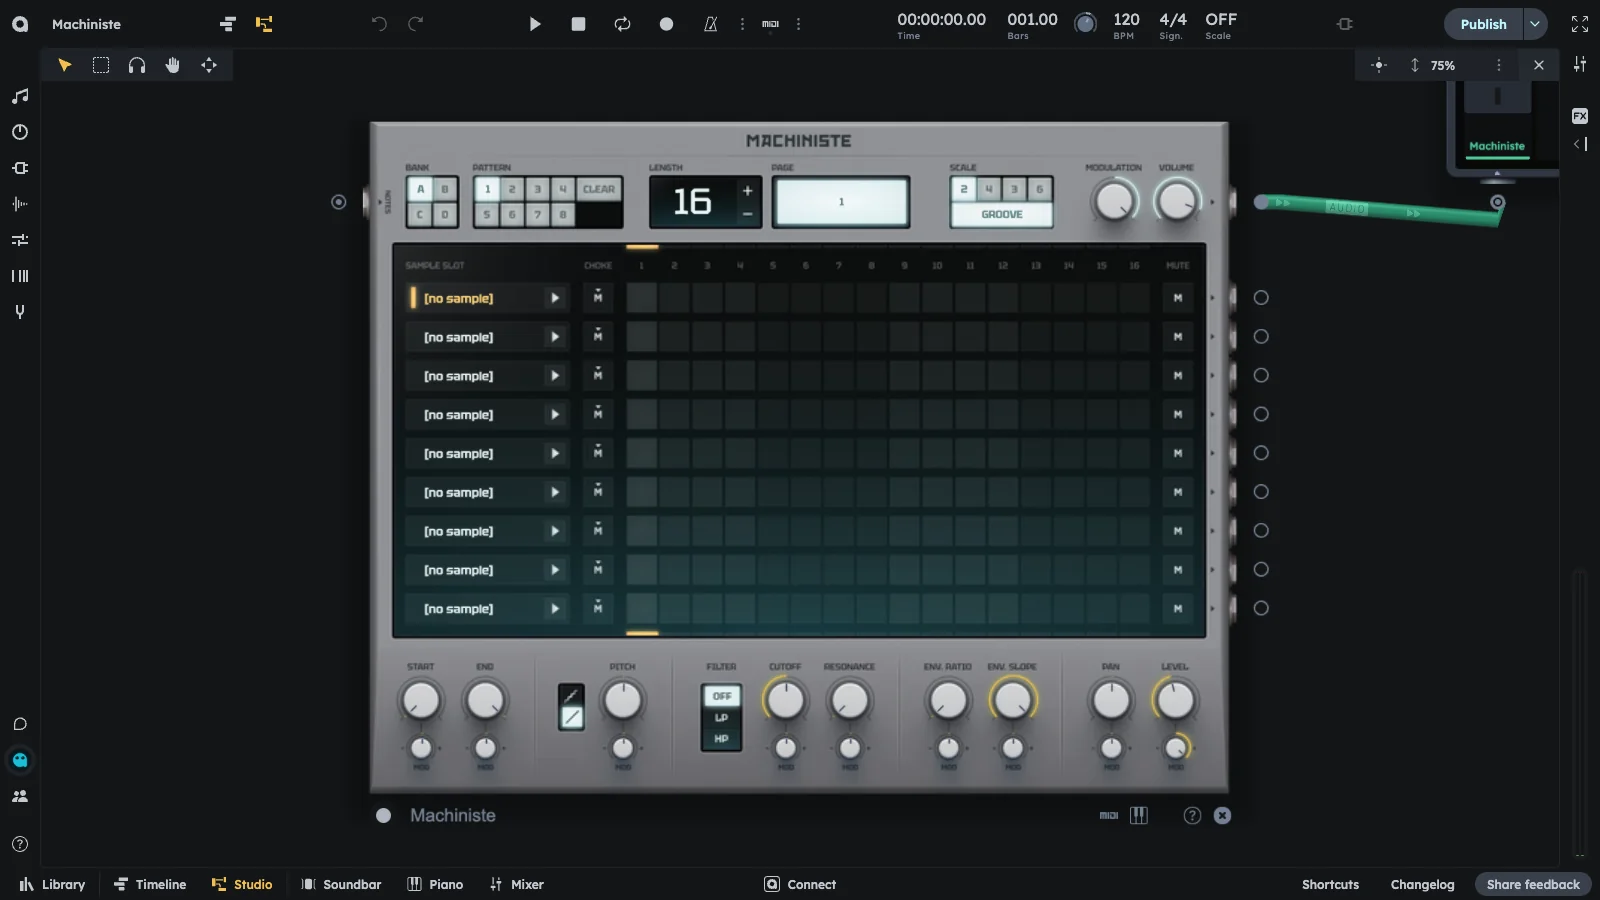
Essentials
- Up to 9 sample slots (load your own or use library samples)
- 16-step sequencer
- Per-slot sound editing
- Choke groups and shuffle
- Great for custom drum kits and sample-based rhythms
Loading in Samples
Getting samples into your Machiniste is easy! Here’s the step-by-step process:
- Double‑click any sample slot in the Machiniste.
- The sample browser will open. Preview different samples by clicking on them or using the up/down arrow keys to navigate.
- Once you’ve found the sample you want, double‑click it or press Enter/Return to load it.
Useful to know
- Right‑click on a slot and select "Search Samples" to open the browser
- Open the sample browser first, then drag and drop any sample directly into a slot
- Replace an existing sample by dropping a new one on top of it
- And of course, you can always right‑click on the device and select “Load Preset” to find entire kits with and without patterns
Global Controls
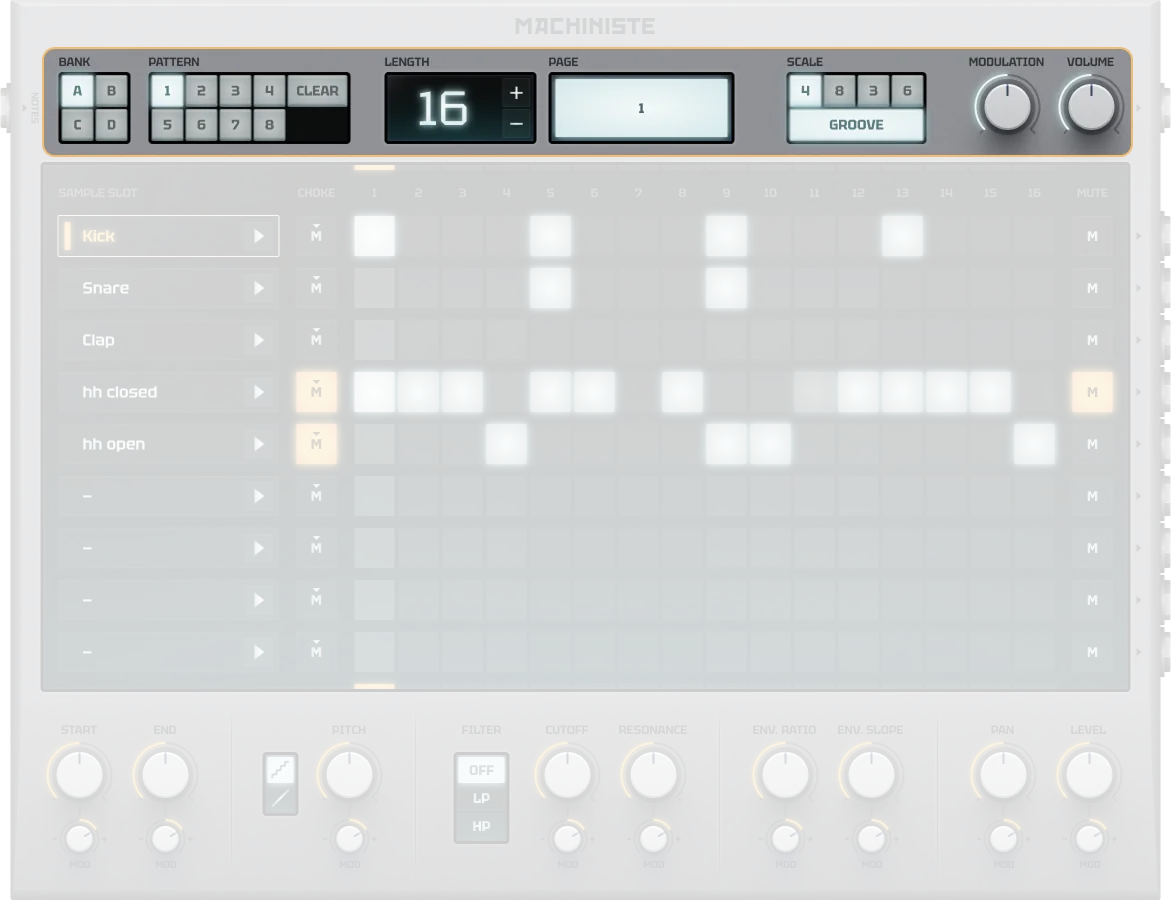
Slots & Pattern Editor
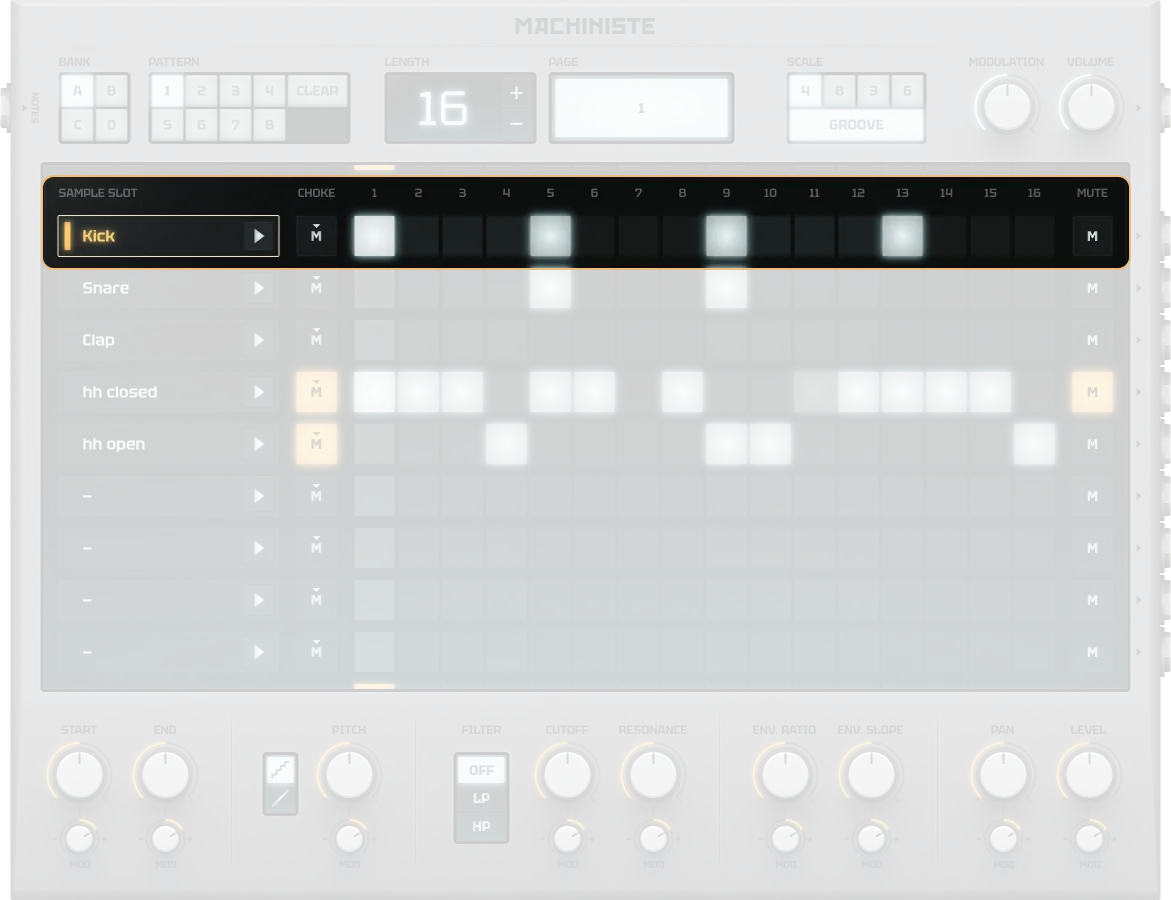
Slot Controls
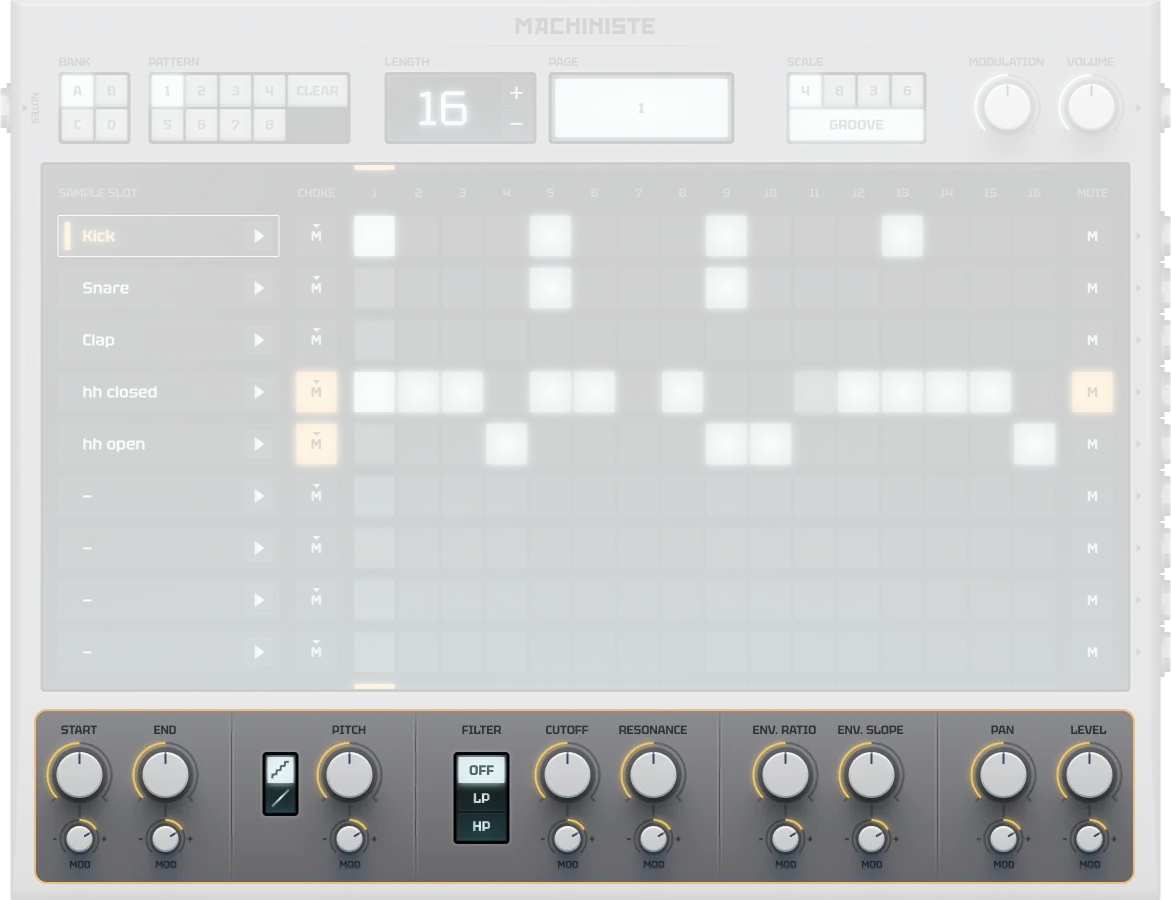
Modulation Depth Parameters
Each slot control parameter has a corresponding modulation depth control that determines how much that parameter varies based on step sequencer modulation values. All modulation depth parameters share the same range and behavior:
Want more variation in your beats? Use modulation!
- Set the given parameter knob to the desired start value.
- Set the modulation range with the small modulation knob below the parameter knob.
- The parameter will now automatically change between the start and end values based on the modulation set in the step sequencer.
Using Modulation
Modulation in the Machiniste allows you to create dynamic, evolving beats by automatically changing parameters for each step in your sequence. Each parameter has its own modulation control that determines how much that parameter will vary based on the modulation values you set in the step sequencer.
The modulation system works by multiplying three factors: the global modulation depth, the parameter’s modulation depth, and the step’s modulation value. This combined “mod amount” then affects the parameter value. For positive modulation: mod amount × (1 - parameter value) + parameter value. For negative modulation: mod amount × parameter value + parameter value.
For example, if you set the Level parameter to 50% and the Level modulation to +50%, steps with 100% modulation will play at 75% volume (50% + 50% of the remaining range).
- Select the channel you want to modulate by clicking on it in the channel list.
- Set the main parameter knob to your desired starting value.
- Adjust the small modulation knob below the parameter to set the modulation range.
- Click on steps in the sequencer grid to activate them.
- Drag up or down while clicking to set each step’s modulation value (0-100%).
- The parameter will now vary automatically based on each step’s modulation value.
Examples:
- Level Modulation: Set Level to 30% and modulation to +70%. Steps with 100% modulation will play at full volume, while steps with 0% modulation will play at 30% volume.
- Pitch Modulation: Set Pitch to 0% and modulation to +100%. Steps with 100% modulation will play 2 octaves higher, creating melodic variations.
- Filter Cutoff: Set Cutoff to 50% and modulation to -50%. Steps with 100% modulation will have a darker sound, while steps with 0% modulation maintain the original brightness.
Pro Tip
- Steps with 0% modulation are completely unaffected by modulation settings
- Use the Global Modulation Depth to scale all modulation across all channels
- Try modulating Start/End positions for creative sample chopping effects
- Combine multiple modulated parameters for complex, evolving rhythms
Practical Tips
Practical Tips
- Keep it simple: 3–4 sounds are enough for a great beat.
- Use Mute to focus on one sound.
- Use Choke for realistic overlapping.
- Apply Groove for swing.
- Make multiple patterns and switch live.